SYNTHETIC DATA GENERATION
Computer vision image recognition has seen success in multiple industries, from healthcare to autonomous vehicles. Having AI identify different classes (from people to vehicles) can lead to endless opportunities. However, training a computer vision neural network requires a very large and labeled dataset, which can take years for people to annotate, and it can be hard to identify rare situations. How can we artificially increase the amount of data needed to train computer vision models?
3D Artist
Technical Artist
Motion Capture
March 2018 - August 2021
As a 3D artist, we created synthetic data which could be generated from animation software or game engines. By procedurally generating environments, we generated millions of training images AND labels for data with only a few months of asset creation. Plus, we populated scenes with underrepresented classes from real life data to augment the computer vision model. In the end, we collected training data at a fraction of the time and cost it would’ve taken someone to take all those photographs.
Blender
Maya
Substance Painter
Substance Designer
Python
Arnold
Unreal
Unity
Rapid Prototyping
3D Modeling
Texturing
Rendering
Rigging
Programming
Motion Capture
This is an ongoing research project at the Robotics Institute.

A sample scene that me and fellow artist Melanie Danver made.
As artists, we were working for machine learning scientists as they tested their computer vision models to identify different classes in a scene, such as people and vehicles.
Our objective in the beginning was quite clear: figure out a way to make synthetic data (and their labels) feasible for creating training data that is both accurate (such that it can be mixed with real-world footage) and efficient (be made with a fraction of the human labor). From these parameters, we went about creating synthetic scenes using different techniques and mindsets.
Strategy 1: Photorealistic Scenes
Our initial goal was to create a scene as realistic as possible. Videos were determined to be the easiest way to generate data, as each frame could be used as a separate image. A Generative Adversarial Network (GAN) discriminator would then be applied to style the video to appear more like real-life footage.
Using Maya plugins (such as MASH) to generate rocks and foliage, we sought to create photorealistic data with assets/textures from Quixel scans (with help from Substance Painter and Designer), 3D models handcrafted by hand and acquired from online stores like Turbosquid, and realistic sun angles for accurate lighting. I was primarily in charge of character rigging and environment art creation (such as buildings). We primarily used Maya as our base application, from which we would generate scenes.
By using different sun angles, data variety could drastically go up.
For motion, we used Carnegie Mellon’s motion capture lab to record realistic motions (with myself as a model). I helped to direct the motion acting, as well as cleaned the data up using Motionbuilder, before applying them to our 3D character rigs.
In order to create a large number of images, for each 5 second sequence we made, we changed the sun angles and camera that we used, turning 150 individual images into 58,500 images. Render times were kept below 2 minutes per frame (using Arnold).
.jpg)
Me in a mocap suit, at Carnegie Mellon's motion capture lab.
Positives
We made our scenes so realistic that there were questions if the synthetic datasets were "real" or not. By making videos, we were able to easily create 60 images per second, multiplied by the sun angles and animations we put in. Plus in combination with our modeling skills, we were also able to find 3D models of underrepresented classes, such as women or large trucks.
Negatives
Our scenes became very unwieldy; they were slow to process due to the amount of foliage. Plus, even though 2 minutes per frame sounds fast, it would still take days to render the entire video. We had to get access to a server such that we could render while working. Speaking of time, we placed a lot of elements like buildings and vehicles by hand, which made scene creation take weeks.
Strategy 2: Semi-Automated Scenes
Once we handcrafted our scenes, we realized that we could optimize several parts of our scene creation pipeline. Using Python, I created various scripts to aid our work, including:
Vehicle Rigging
In order to augment our scene assets, we acquired additional 3D models from 3D asset stores (such as Turbosquid). Many of the vehicles we found online are not rigged, so we rigged them by hand. To reduce the time needed to rig them, I coded this script which produced controllers for the hood/trunk, the body, and the doors, rigged them with the corresponding vehicle part, and linked wheel rotation with forward movement. A movable vehicle with a click of a button!
Vehicle Spawning
Before when we made a scene, we would have to place vehicles by hand. However, I made a script that created designated spawn points, thus allow us to randomly generate vehicles at appropriate locations, with a window popping up to determine the number of vehicles, type of vehicles, and whether the vehicles would move or not.
Depth Map Creation
With help from researcher Stanislav Panev, I made a script which generates a depth map of the scene, with white being closest, and black being furthest away. This script automatically generates a depth map from each frame for every camera. This helped us generate labels, since it’s an easy way to determine occlusion, or if a subject/object goes behind another object.
Blinking
I made a script that allowed us to induce blinking onto a person model without having to manually animate it. One could designate a time period and the script puts in blinking at random intervals by manipulating the blend shape deformations.
Positives
We were able to reduce our scene creation time by 67% through these scripts, as we no longer needed to do certain tasks (namely vehicle placement, depth map creation, and character animation) by hand.
Negatives
Coding the scripts proved to be a challenge because Autodesk Maya used an old, unsupported version of Python (2.7). Not only did the lack of comprehensive documentation and lack of object-oriented programming focus make scripting more tedious, but it also made integrating our process with the machine learning scientist's pipeline more complicated, since they used Python 3.0. Plus, we believed we could still further optimize our scenes, since buildings were still done manually and render times were unchanged.
Strategy 3: Procedurally Generated Scenes
Although our photorealistic scenes had decently low render times for their detail, there was still work in lowering the amount of time that was spent waiting for scenes to be ready. Plus, with new studies showing how silhouettes were more important than photorealistic renders (domain randomization from Nvidia), it was determined that lower quality renders would help to speed up our process.
We made the switch to Blender, which was more lightweight, offered more programming resources (using Python 3), and offered both real-time and frame-by-frame rendering.
By incorporating more code and using Blender’s wealth of plugins (such as building generation), we were able to make larger cities with more vehicles at a fraction of the time we used to (from two minutes in Maya down to 20 seconds per frame), especially since we were not focusing on photorealism.

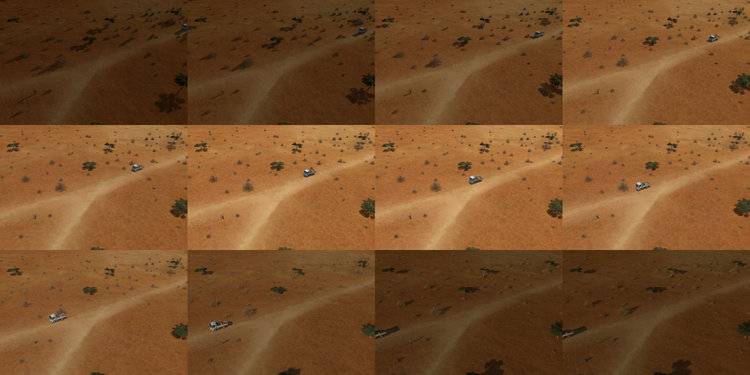
An example of domain randomization, programmed in Unity by my colleague Kevin Carlos. Notice how the random textures and objects don't impede on your ability to see the vehicles' silhouettes.
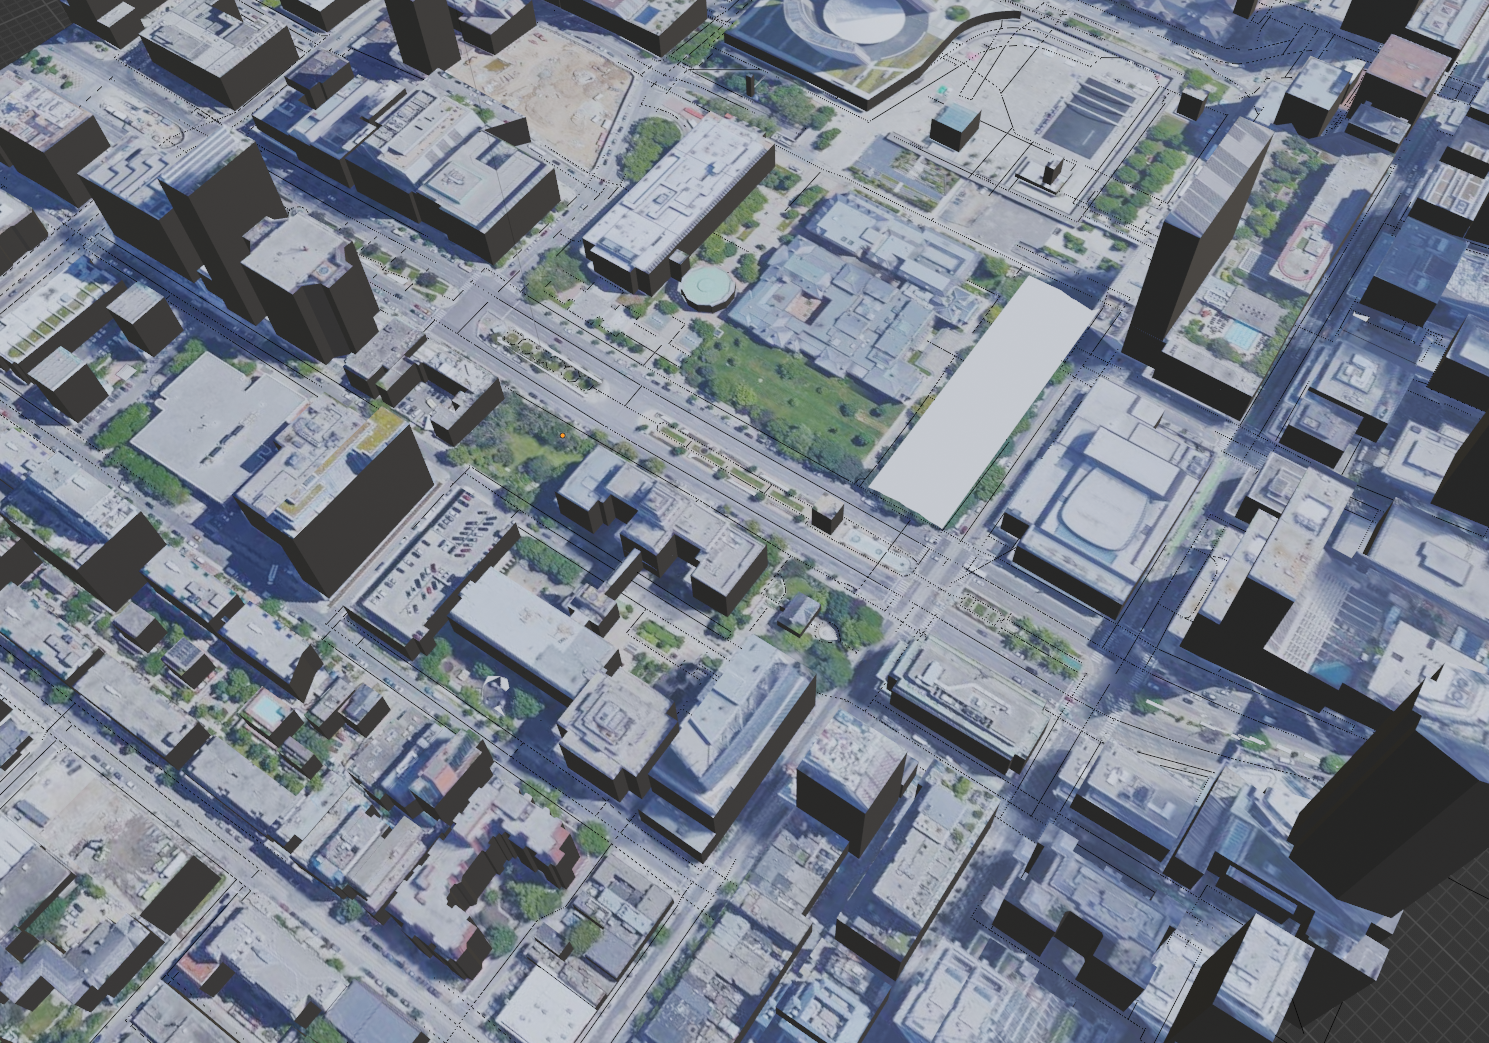
A sample scene of Toronto, recreated in Blender with BlenderGIS and SceneCity.
Positives
Blender was a massive improvement over Maya because it offered real-time rendering (through Eevee) which made scenes render in 20 seconds as opposed to 2 minutes. Plus, it had support for Python 3.0, which made coding not only easier (especially when integrating with the machine learning pipeline) but also led to us finding many plug-ins to further automate our process.
Negatives
Not only did we have to search for plug-ins which helped our process, but we also had to work in the confines of these plug-ins, which restricted what we could. In the meantime, we needed to convert our scripts in Maya to ones that could work in Blender.
Research takes a LOT of time to manifest
Research is iterative, and in a topic as new and confusing as computer vision, every breakthrough comes with... multiple dead-ends and failures. We worked on a lot of scenes which did not end up improving machine learning models. We had to figure out why, and come up with a possible solution that could address that.
Learning on the fly was key
Because the field we were in was ever-evolving, we needed to come up with creative solutions for new problems QUICKLY. Oftentimes, we had to think on our feet, drawing on what we knew or learn new methods and software. I had to quickly learn game engines, motion capture, and even setting up version control for artists amongst other things in order to make sure we were well equipped with what the machine learning scientists needed at the time.
Cross-functional teams were the norm
Since I was an artist working with machine learning scientists, I needed to learn enough computer vision to understand what they needed. Then, I needed to identify what I had in my 3D artist toolkit that could help them, and communicate it to them in a way they could understand (not everyone knows about UV’s or character rigging), which helped them scope their projects.
